Problems are usually no forward or reverse operation, or leakage out the valve top.
If you look at the basic principle you are controlling hydraulic pressure between two chambers.
One side being the charge pump output, and the other side being the pump and motor kidneys.

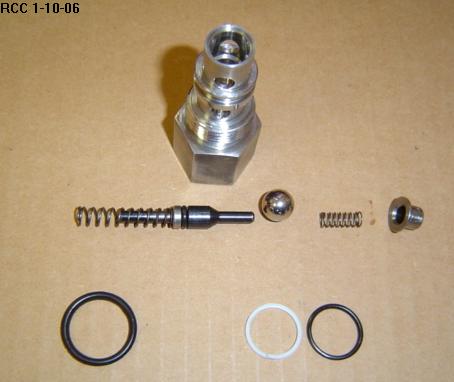
Looking at a check valve from the side you can see there is an O-ring at the top to seal one end, and another O-ring between the holes in the valve dividing the two chambers. Some springs and a steel ball inside regulate the flow between the two chambers. Also inside a small O-ring to prevent hydraulic fluid coming out the top where the release pin is on the older check valves, and a small hole on the newer auto release valves.
If I have problems with a check valve the first thing I do is clean the area around the valve good to prevent getting dirt into the hydro, then remove the check valve. Remove the exterior O-rings, the plastic O-ring has a diagonal cut across it to facilitate removing it. Clean the check valve in solvent and then blow dry with air pressure. I like to blow air through the small hole in the bottom in bursts to bounce the steel ball up and down. This will help remove any foreign particles preventing sealing of the valve. If the exterior O-rings are suspect then replace them, you can get them from your Cub dealer. Before I replace the valves into the hydro I dip them in a small container of hydro fluid to remove any solvent.
If you still have problems it is probably damaged inside, or if you have leakage out the top the small rubber o-ring inside is wore out, it is RECOMMENDED that you replace the check valves at this point.
HOWEVER if you have the resources and are willing to assume the RESPONSIBILITY, here is a procedure I use to rebuild the check valves. This is a one time rebuild but I have saved almost every one that I had previously thought were throwaways.
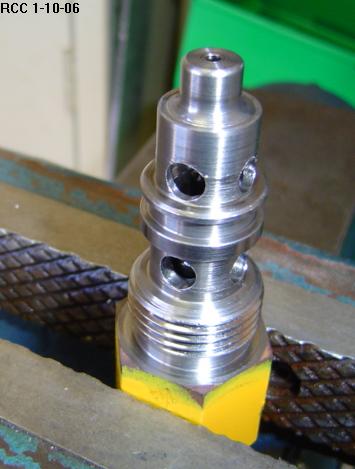
The check valves are built with a crimped or rolled edge over a top hat type end piece as you can see in the picture below.

To get the check valve apart you need to cut off the crimped edge.
Put the check valve in a metal lathe like the picture below.
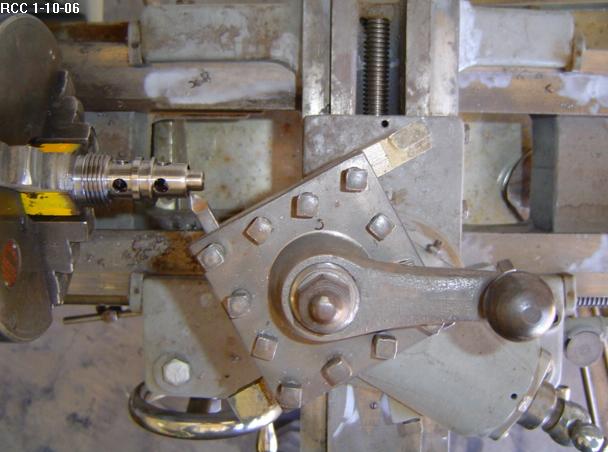
Just cut off the crimped part until you are flush with the top hat type end piece as pictured below.
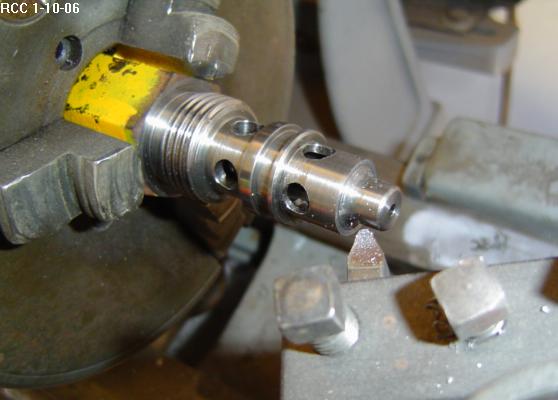
When you are done cutting it should look like this:
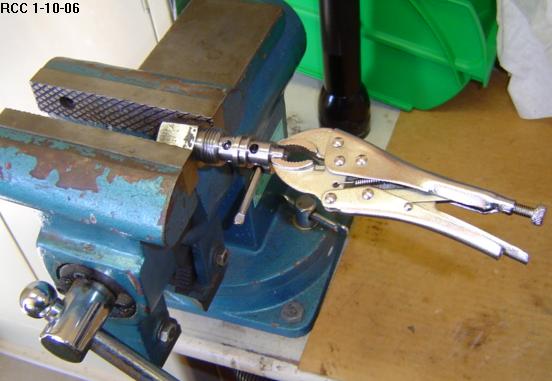
Then place the valve in a vise, and clamp a small vise grip on the top hat end. Rotate the top hat end piece around several times to loosen it up, and then place your left hand under the end while you rock the top hat back and forth with the vise grip. The top hat will pop off and the springs and steel ball will go flying if you don’t catch them in you left hand. The first time you do it you probably won’t catch them.
These are all the parts you should have now. Note the indentation in the valve assembly where the top hat was removed, when you re-assemble, the top hat end piece will fit snugly back in.