Cub Cadet FAQ's
Starter Rebuild
Info by Matt Gonitzke
I got sick of playing endless games with the starter on the
KT-17/M18. Every single one I had would either stick,
engage once and then not when hot, and also screech a lot.
The IH 682 I got recently started doing this to me,
and here's what I did to fix it:
1. Disconnect the battery, set the brake, and remove the left side panel. Unbolt
and remove sheet metal surrounding the left cylinder head. This may require
removal of the top muffler shield.
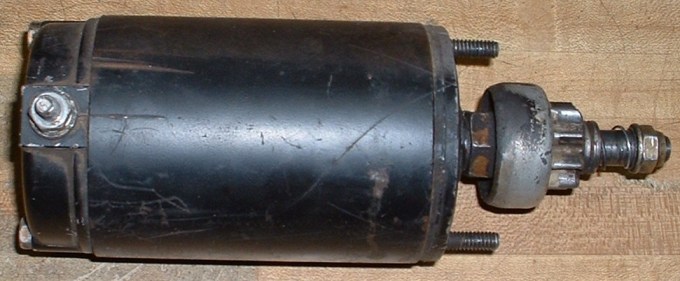
2. Now you have the starter exposed. Remove the positive (+) cable from the
starter.
3. Here's the secret to removing the starter without unbolting or pulling the
engine:
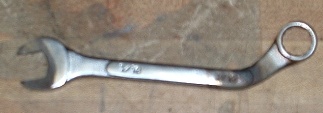
Get yourself a crappy Taiwanese or whatever short 7/16" wrench, and heat with a
torch and bend like the one in the picture.
The wrench is bent once, and you access the nut from the top. I'm not sure
that's a 45 degree angle,
you might have to find an angle that works for you by trial and error.
It would work better if the wrench was slightly shorter and if it were
bent a bit more.
Now you'll be able to access that bottom nut without pulling the motor.
Remove the starter from the tractor.
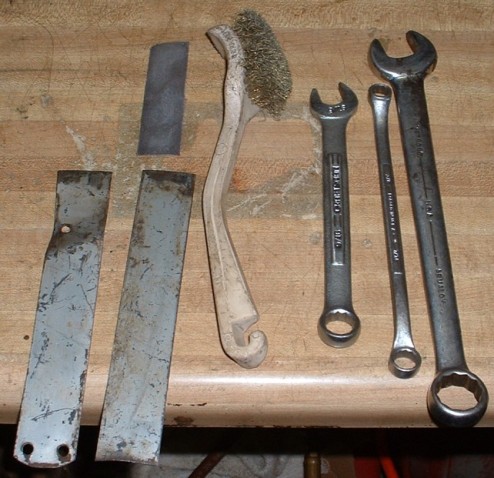
4. Here are the tools you'll need to disassemble and reassemble the starter. A
13/16" wrench, 9/16" wrench, 3/8" wrench, Brass wire brush, small piece of emery
cloth and two small pieces of thin metal. A service manual is also handy, and
would help clarify things in the next several steps.
5. Remove the nut holding the spring, washers, and bendix
gear on the shaft. Be careful not to lose any parts and lay them out on the
workbench in the order that they are removed.
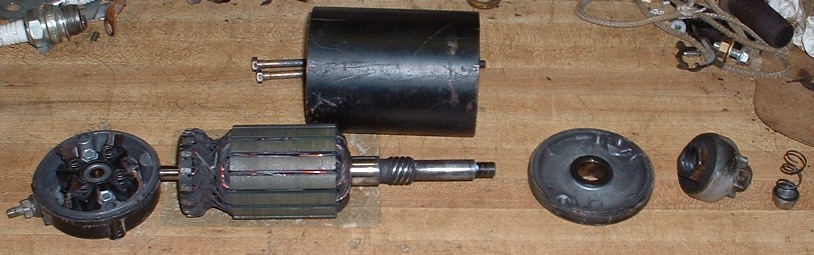
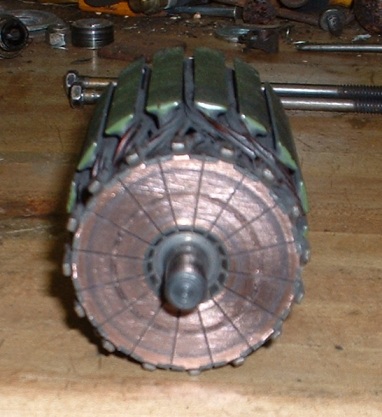
6. Scribe marks into the ends and the main case so that
when you reassemble it you put it back together right. Some starters have match
marks, some don't. Take out the 2 long bolts holding the starter together.
Carefully lift off the end cover on the bendix side, then lift out the rotor
CAREFULLY. Be sure not to lose any of the brush springs when you do this. Remove
the main case from the end cover. Now you have this:
7. Thoroughly clean all moving parts, particularly the bushings in
the end covers, the bearing surfaces on the rotors, and the bendix drive spline
and outer portion of the shaft. Inspect the brushes for wear, and use the emery
cloth to clean the commutator, and wipe it off with a clean cloth when you are
done to remove abrasive particles.
8. Now it's time to begin reassembly. Wipe
a light coating of grease onto the areas of the shaft where it rotates in the
bronze bushings, and also put a light coat into the bushings
and on the thrust washer between the armature and the bushing on the drive end
cap. Lack of lubrication on those bushings causes that horrible squealing sound,
and the friction slows the starter down. Take care not to get any on the
commutator.
9. Hold the brushes in position with the two small pieces of
sheet metal, put the armature into the Commutator end cap, and remove the sheet
metal pieces. Put the main case back onto the end cap, and place the drive end
cap in position. Insert the thru bolts and tighten to spec in the manual.
10. Get out your favorite dry lubricant (I used GDL garage door
lubricant, made by the same company that makes PB blaster) and thoroughly
lubricate the bendix drive spline and drive pinion.
11. Reassemble the bendix drive assembly, taking
care not to pinch the spring between the washer at the top and the armature
shaft. Torque the nut to 160 in. lb.
12. Re-install the starter on the tractor, put the sheet metal back where it
belongs, and reconnect everything.
This should work wonders for starting your IH 682, 782 or later Cub Cadet with
the Magnum twin. After doing this to two of my starters, both rotate faster, and
engage every time. Not to mention they are extremely quiet. These tractors now
start much easier, and less cranking time is required. I could probably use
these in the winter if I wanted to; before I'd have difficulty cranking them
when it was below 70 degrees. I would recommend doing this once a year or so. I
took the time to write this all down with the hope that it'll help someone else.